09 10

Saturday, March 28, 2009

A Birthday Card for Cameron


Well here it is! It's Cameron’s 3rd Birthday!! My how time flies! I needed to make him a card (yes it is last minute, I know!) His theme is Thomas the Tank Engine this year. I of course don’t have any Thomas stamps or anything, so I decided to use new Stampin Up sets to make his card. The train is called “Choo Choo” the tracks are a rolling stamp called “Right on Track” and the Trees are a StampsbyJudith.com. The two new sets by Stampin Up will be available to purchase through the Mini Occasions Catalog available on April 1st,. The “CHOO CHOO” is using a set of alphabet stamps that my secret sister frommy fav MB sent me. (Hi Steph!)
Although it isn’t Thomas, I hope he will still like it!

Simple "Thinking of You" cards


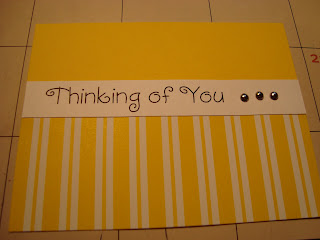
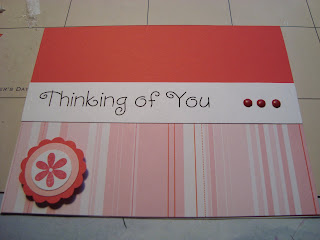
So I was in a little creative slump. Not so much because I wasn’t feeling creative, more so that I have just been too tired to think of something new. So anyway, I needed to make Thinking of you cards for the 2009 Addicted to Cardmaking swap that I host on my fav MB. I wanted to do something simple for this one, mostly so I could get them done since I am a bit behind on things. So here I took the red/pink paper from one of the paper stacks I have, added it to some red cardstock. Then I printed the sentiment on my computer. I cut that down into strips, added it to the card, and used 3 little brads on them. The first one, I wanted it to be feminine. I used my ¾” punch and 1” punch, which are both Stampin’ UP, along with a small scallop circle (EK Success). I used a pop dot to give it dimension.
After I made them I was looking at them and thought that I wonder what it would look like if I dropped the flower, and picked out some more “manly” colors. So I tried it. The yellow and blue are going to be used for my Monthly card front swap on my Fav MB.

Monday, March 16, 2009

Happiness Card


I actually had made this card prior to my injury! I used Stampin’ Ups stamp set Petal Pizzazz. I stamped the different flowers from this set in Real Red, So Saffron, and Taken With Teal Classic Ink colors. I stamped them all on Pink Pirouette cardstock. Then I cut a strip of Real Red Cardstock, and used the Scalloped edge punch on the one side of it. I adhered that down to the So Saffron Cardstock, then layered the Pink Pirouette on top. Then I used the sentiment from Stampin’ Up’s Heard from the Heart set. It turned out to be a pretty cute card! Hope you like it!

Spring Month's ATCs


So despite my injury and crazy weekend, I was able to get some crafting done this weekend! Of course it meant I stayed up until 3 am on Saturday night! But hey I like it then, nice and peaceful without anyone calling me!
So here are the ATCs that I created for the Spring Months ATCs on my Fav MB. It is hosted by ChewysMommy. It is a continuation of her Winter Month’s ATCs. I had to make ATCs for the months of April May and June.
The top one is titled June brings…Summer fun! It uses Stampin’ Up’s Crab and Company set. I loved that set forever! I finally broke down and ordered it in my starter kit! On the background I made a mask, sponged in a blue sky, then I took my chalk ink pad and sponged the sand. I didn’t like how that looked so I added a little of Stampin’ Up’s Chocolate Chip Classic Ink. I tore a little “wave” pattern in scratch paper to make it look like the dips in the sand. Then I stamped out Mr crab, and a few of his fishy friends and cut them out and glued them on so they had some depth!
The middle one is for May and is titled April showers…bring May flowers. I love that little mouse! It looks so sad! Poor thing! Makes you almost want to invite him into your home…but not quite!
The bottom one is for April and is titled Easter Blessings. It uses a stamp that I have had in my collection. I used the Stampin’ Up’s Scalloped edge punch. I added the little sentiment underneath. Simple but cute!
I enjoy making ATCs! So quick and easy!

Friday, March 13, 2009

Don't fight with a steak knife!

So I learned a valuable lesson last night. If you are having dinner, and a steak knife slips off of your plate, as long as it isn't going to hit a child or pet, don't try to grab it!!!!!

Last night I settled onto the couch, which is where I have been eatting when David is off since mom is with us. I was already to sink my teeth into the juicy steak that David had grilled out. And the steak knife slips off my plate. I tried to grab it and instead, stabbed myself right in the palm of my right hand. As the blood was gushing, yes gushing, from my hand I yell to David for papertowels! He just looks at me, until my mom started yelling! He rushes me to the ER. I am trying not to pass out or vomit as he talks to all the people he knows from work (he is a prison guard, and one of the "residents" was also in the ER).
The Doctor said he wasn't going to glue or stich it as he wants it to drain. They gave me a tetnus shot as I wasn't sure when my last one was. He shoved the little piece of "meat" back into the hole and cleaned it up put me on an antibiotic and sent me home. He was glad that the knife was clean before I stabbed myself! (I guess you have to have something good to look at!)

This is not the first time I have cut myself with these knives, but the first ER visit. Sad thing is, I bought the knives for us Christmas 2007 as I wanted better knives! They are pretty sharp!

David brought me home, reheated my dinner and cut my steak for me!

Cheyenne was in the room when it all happened, but she told me when we got home that she thought it was barbeque sauce. It was probably a good thing! But she was upset that I bled on her jacket! (Maybe that will teach her to hang it up like I tell her!)


Sooooo anyway, I will try to stay motivated and still post, but please...no poking me with sharp objects if I fall behind!

I have followers!!!!

Maybe this isn't that amazing to some of you, but I am so very flattered that I have followers!
I used to feel that my creations were not worthy. In the begining of my Blog I felt a little embarrased by my creations and thought people would laugh at them if they saw them. I do however feel that my creative side has grown, and that was the reason for this blog.
I will do my best to keep posting, and would love to see more followers in the future!

Thank you to all of my Cricut.com friends, you keep me motivated!

Wow this site is really nice!

So I was looking at different Blogs today, and found a link to this one. They have all sorts of free backgrounds for your blogs and wanted to make mine a little different!
So what do you think?


Here's the website:

http://www.thecutestblogontheblock.com/index.php

Sunday, March 8, 2009

Card made with Card Candies!


Ok so I hosted a card candy swap on my Fav MB last Fall. And to be honest I haven't done anything with the card candies that I received from the swap. Not that there is anything wrong with them, they are awesome, I just never did anything with them! I made these candies for the theme, Thank you. I needed to get a card made for my Secret Stamper the other day, so I used the elements that I had made to create this one. The vase and stems are cut using my "Walk in my Garden" Cartridge. The bows were from a RAK that someone on my fav MB sent me, and the flowers are from a craft store. I ran the white cardstock through my embossing machine, leaving the cardstock longer then the embossing folder. Then I stamped the "Merci".

Quick little Get Well soon card


I needed a quick Get Well Soon card the other day. This one is really simple! I used paper from the a patterned paper stack. I added some pretty flowers, and what we on my fav MB call Skittles, then stamped out a sentiment from the "sincere Salutations" Stampin up set. Like I said quick and simple!

A bright Valentine or Love card


I had actually created this card for a swap for the PhillyInkers, however the meeting we were to have was rescheduled, and the following meeting the set that I had used went onto the Discontinued list. I did however use the cards for a swap on my fav MB, and I also used them to send to the folks in my Stampin Up club. So it really wasn’t a big deal in the end!
Ok so I used Stampin Up’s Something New to Love set. I chose some different colors of pinks and red inks. I used Pink Pirouette, Pink Passion, Riding Hood Red and Real Red all of which are the Classic Inks. I also used the Black StazOn ink. I added a piece of Pink Passion cardstock, and tied on a strip of the ¼” Grosgrain Real Red ribbon. It is a little bright, but I like it!

Thursday, March 5, 2009

My Profile Picture


So are you wondering about my Profile picture????

Well the kids and I had gone to the pool one day last summer, and when we got home, I came around the corner of our house and there it was. It looked like someone had cut the sky into sections. I had to grab my camera and get a picture! Cheyenne said it was the "beatifulest sky she had ever seen!" I must admit it was really cool to see! Thank goodness I had my camera with me!

A really bright card!


Ok so some of you are going to hate this card! I wanted to make something with all of this bright pink cardstock that I had laying around collecing dust! I made these for my Addicted to cardmaking SWAP on my favorite message board. The theme for these is "Buttons and/or bows". I chose to do bows. The flowers are different stamps I had around. I used three different stamp pads that had a pearlescent ink. I didn't stamp a sentiment, so that the reciever could decide the occasion! Maybe they could do a "A card to brighten your day"????

Pirate Birthday card


I made these cute little Pirate cards for a friend of mines' little boy's birthday. I liked it so much I decided to make some more! I used the "Ahoy, Matey" set by Stampin Up (it is now retired) I colored it with my Stampin' Write Markers. I cheated on the sentiment, I typed it on my computer and then cut it out and mounted it. It's kind of plain, but I think it turned out cute! I used a grey ink pad to stamp the images on the background paper.

Spring/Easter Card Front


Ok so this was supposed to be for the Monthly Card front swap that I am hosting on my fav MB. Just one problem, it is a card, not a front! I realized when I had finished it that I had made the mistake. But since I am the hostess, I chose to still use them! Whoever receives them will just have the whole card, rather then just the front!
I used my Swiss Dots Cuttlebug folder to do the embossing. Then I used paper from a patterned paper stack. (I think it was a spring one, but I could be wrong). I added the paper to a torn piece of paper and tore the pattened paper to give it some dimension. I cut the oval with my Word Window punch from Stampin Up, and stamped the little "Easter Blessings" sentiment. It will show on the inside of the card once it is opened. The flowers and the buttons are from a wonderful RAK I recieved from someone on the m fav MB. I added some ribbon and Viola Easter card!

Thank you card


I needed to make a Thank you card for my 2009 addicted to card making for February. It is a little hard to be creative right now with all that is going on with my mom. (she fell in January and broke her leg. She is staying with us while she recovers). Anyway, I needed to find a design that was simple but still cute. So I used this paper I had it in my paper box, oh, for YEARS. I got it from one of the big boxes stores way back when. I stamped the “Thanks so Much” from the Sincere Salutations by Stampin Up. I added a ribbon that I tied in a simple knot (don’t ask me what that kind of knot is called, couldn’t tell you!). It’s a simple card yes, but I still think it turned out ok.

Wow Flowers Birthday card


I needed to make some cards for the folks in my Stampin Up club, and also some cards for my 2009 Addicted to Cardmaking swap. I also wanted to show the difference that using Stampin Up products make when you create a card, so I went ahead and made these.
Now please know that I CASEed (Copy and shared everything) from a design by a fellow PhillyInker, Ilina Crouse. (thanks Ilina!) She had designed this card for a ShoeBox swap that we had at one of our PhillyInker meetings. I used the Stampin Up set “Wow Flowers”. The first picture is the two cards together. The card on the top used all products (except the ink colors) that I had purchased at one of the big box stores. In the card below, I used all Stampin Up product. The cardstock is Real Red and Pink Pirouette. The ribbon is the 1/4" Real Red Grosgrain ribbon. I also used the Real Red Classic Ink along with the Pink Pirouette Classic Ink. I used the 1 ¼”, 1 3/8”, 1 inch circle punches, along with the Scallop circle and the scallop border punches, all by Stampin Up.

Dips recipe Layout SWAP


I joined a swap for Dips on my fav MB, hosted by HeidiK. Now I don’t normally do the layout swaps, because I still feel that my layouts are lacking, but I wanted to do a swap for Pumpkin Dip so I went ahead and joined. I didn’t want the layout to be overly “in your face” so I decided to start with torn edges, add a little color and design with my Stampin Up rolling stamp, “So Swirly” with my More Mustard Ink pad. I then colored two different Pumpkin stamps that I have with my markers. I used Dimensionals to adhere them to my page. Now, I did run out of colors of the cardstock, so I had to make some of the LOs with grey in the background, and some with the grey in the foreground. I hope that everyone likes them! Also I covered the recipe, as I heard that that was “the thing to do”.