
 Yes you guessed it, another lost tooth!! Now she is missing 4 I think. At this rate she is going to be all gums soon!!! Yes you guessed it, another lost tooth!! Now she is missing 4 I think. At this rate she is going to be all gums soon!!!
 LOL I found this before picture of her teeth! Taken in late October, early November. See the space that was there??? This is like one of those weird pictures you'd see in the fun house mirrors! LOL!
 And of course it wouldn't be Cheyenne if she didn't pose for a fashion shot! :)


 I entered Cheyenne in a swap for Kids Christmas cards. I think they wanted up to age 12. She had a great time making the cards for this!!! She took two groups so she made two designs. All images are by Stampin' Up, ("Dasher" and "Wandering Words") but supplies are what we had on hand. The sentiment on the twill says "Merry Christmas". I hope all the kids that receive them like them as much as she enjoyed making them!
 Although these are HORRIBLE pictures, I made these two tags for a tag swap on my fav. MB. The top ones are for the "Love/Valentine's" theme. The flower ones are for the "Anything Goes" theme. I used some cardstock and rubber stamps that I had on hand for these. The vases are colored with my Stampin Write Markers.
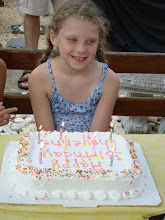
 There was plenty of them! (Wish you could see her smile better! Missing and wiggly teeth make for cute smiles!)
 And throwing them into the air.
 They had a great time, and I am glad I was able to snap some pictures of them! Who knew raking up leaves could be so much fun????
  "One, Two.....
 Three.....
 Blast Off!!!!!"
 I needed to make a stair step card for a swap that I am in on my favorite MB, and this is what I came up with. I have to be honest, it took me three attempts to get the folding correct, but it finally worked out right! The front fold also has snowflakes stamped in blue from Stampin Up's Christmas Punch hostess set, but you can barely see it in this picture. The die cut snowflakes were from those kind that you can buy in the craft stores that are already premade. The stamps are a clear set that I had on hand from last year I think. I love these little penguins! I colored the image with my Stampin Write Markers by Stampin Up.
 I knew that the meander book that I posted below needed more to it, but at the time I didn't know what. I took another look at it and here is what I came up with. On the front I added two layered flowers and in the center added the little plastic bead, which we affectionatley call "skittles" (not the real name). Then in the center of the book where I had previously made pockets, I used Stampin Ups Tab punch to punch out tabs that I had stamped using the "Totally Tabs" stamp set.
 OK so this is my first attempt at making a Meander Book. I took the tutorial from a popular website among crafters and SU Demos alike. I have to say that this is actually the third piece of paper that I used, as I just was not understanding what the instructions were telling me to do. Maybe I am just dense???
 Open a new document. I moved the right Margin over to about the number 7. I then moved the left margin over to about the 3 mark. You can always play with that later!
 I typed in a sentiment, and highlighted it all.
 Over in my fonts box I scrolled until I found a font that I liked. I tried a few before I found one that I though looked kind of robot like.
 I typed in my sentiment and adjusted the sizes as I thought was needed. I also changed what I wanted it to say. I often times will do a search for a sentiment for cards, but after 2 hours of looking for one, I made up my own! There are a lot of sites out there where you can get free fonts, so if your computer doesn't come with one that suits your needs, do a search and you will find some great freebies! The one I used here was called "Hurry Up" and I have no idea who it is by, sorry!
 This is the card I am making the sentiment for. I made these using Stampin Up's "Lots of Bots". The cardstock I used was stuff I had on hand. I made these for a swap on my fav MB last Saturday during a Crop that my friend Terri's sister had in New Holland. OK...so back to the card.
 Here it is all printed out and adjusted, etc. Then I trimmed the paper down to be slightly smaller then the card itself. I believe I went down to 8 x 4.
 I applied adhesive to the back of the left side of the paper. Folded it in half stuck it in the card, with the folded paper as far left into the fold of the cad that it could go. Closed the card and pressed down to make it stick. (yikes look at the freckles!)
 And here we have it, the finished card!
 You could of course also just apply the paper to one side of the card and omit the other side. I like it to have both sides, like that big card retailer does! You could also use some patterned paper inside, or I guess even Velumn. I have never printed on velumn though, so I don't know the steps for that.

 Next my awesome storage drawers. Those first three stacks, all have stamps in!
 My ribbons. OK really this is just some of them. I have three more dowels on the other wall with the drawers. And there is ribbon hiding elsewhere. I kind of have a ribbon addiction (as well as a stamp addiction).

 I made this card for Brianna's 6th birthday. I have had the patterned paper FOREVER! The image is from Stampin' Up's Crazy for Cupcakes set. I colored the image with my Stampin Write markers, and added some glitter glue to the cupcakes. The yellow side is embossed with a birthday themed folder.
 Have you always loved Stampin Up's markers, but just don't have the money to put out all at once to purchase them? I have a solution for you!
 One cute lunchbox (sporting a new favorite TV show):
 One little cutie sporting her favorite skort:
 No crying Mommy (at least not on the outside) - priceless


 I had seen these cute dress cards that Patty Bennet had made using her scalloped Sizzix Die, and I thought I would try a scaled down version on these tags. I used my Scallop circle punch for these. They make such cute dresses that can be dressed up so many ways! These are also for the Tags, tags, and more tags swap on "my fav MB", and the theme, is you guessed it, girly.


