09 10

Tuesday, September 27, 2011

Holiday Planners


LOL I can get over how cute these penguins are!!! Anyway I have been hard at work making items for upcoming holiday sales that I will be renting booths at. I made these holiday planners from a composition book! Inside I added the pocket for receipts, and I also added some optional tabs which are in a little bag which I will slip into the pocket. You'll see that I added some of those cute paper beads I posted previously! I love these things! And what a cute way to stay organized for the holidays! Stay tuned more of these will be following!!


Want to get your hands on one??? You can order this one for only $5 plus shipping! Ask me for details!


Sunday, September 25, 2011

Handmade Paper beads

Okay so I came across a blog where it showed how to make paper beads. Can I tell you how HOOKED I am on making these??? The two that are more of a matte finish I made those with Modge Podge. The others I made using UTTE (Ultra thick embossing powder). They are super easy to make, and they are very addicting!!! Stay tuned for some projects that I made using these little gems!

Tuesday, September 20, 2011

Happy Birthday - a piggy card


My daughter helped me with a craft room yard sale I had in July and she kept admiring this stamp. It is a rolling stamp I had FOREVER but just never used. She LOVES pigs, well, I should say she loves pork and bacon! LOL. Anyway she kept playing with it and then made the comment that her birthday was coming up soon. So I new just what to use when it was time to make her birthday card! I added some embossing and some satin ribbon and Viola! She loved it! Needless to say, it was removed from the yard sale pile, and now has a safe place along with the rest of my rolling stamps! :)

Tuesday, August 9, 2011

August Promotion - Buy 3 Get 1 Free

From now until August 31st, Stampin Up is offering Buy 1 Get free on select packs of their Designer Paper. There is no limit on this special, the items just have to be listed on the flyer. Click on the Photo above to see the list of items which are included!
Hurry, offer only good until August 31st!!!

Monday, August 8, 2011

Devastating Fire- Help Needed for a fellow Crafter's Family


As a member of the Card Fairy Army on my Favorite MB, I was made aware of a very devastating story. A fellow member on my favorite MB has posted the story on her blog. Two of her children and their families lost their home and their belongings in a tragic fire last week. In the home were also 2 grandchildren. Thankfully they all escaped the blaze unharmed. They escaped with each other and the clothes and shoes that they had on. The next day the one son-in-law went in and found the flag which draped his father's casket. If you'd like to read the whole story, it is found on Kymberlee's Blog. They are asking for help for these two families. No gift is too small. More details on that are also listed on Kymberlee's blog. Both of the men, both named Nick, proudly serve in the US Coast Guard.

Even encouraging words would be great. Why not send a handmade card if you are a crafter. The address is also on Kymberlee's blog.

Saturday, July 23, 2011

Fall into Autumn Addcited To Cardmaking

Here's another stamp set that I just HAD TO HAVE which my hubby bought me a few Christmases ago. Now I have to say I couldn't decide how to color the leaf pile. I mean leaf piles aren't all one color. So I tried a few different ways, and I think I like this way the best. These are for my Addicted to Cardmaking swap on my favorite MB, the theme being Fall colors. This is the first time I used a big circle/scallop on my card and I do really like it! The background is embossed with a Sizzix folder ran through my BigShot. The twill I colored by pulling it across my (I believe) Soft Suede Classic Ink stamp pad. The PopTop (from a Diet Coke Can) was dyed using alcohol markers. But you could always use alcohol inks. The image I colored with my Stampin' Write markers (Marvelous Markers). The patterned paper is just stuff I had on hand. I love how this turned out!

Friday, July 22, 2011

Boys Birthday Cards


In continuing with the Kid's birthday cards theme, these are the ones I created for the boys. For some reason I am really into Robots this year! I just think they are cute! I picked up this unmounted cutie at a stamp show, I believe last year. I knew I was going to use this stamp when I posted the boy's theme! I colored them with my Marvelous Markers (Stampin' Write Markers) from Stampin' Up. The little hats are stamped on patterned paper then paper pieced onto the image. The sentiment is from the Lots of Bots set by stampin' Up. I believe the hats came from the Sock Monkey accessories set. These were fun to make. Again I couldn't decide on the colors. I thought the grey color was more robot-like, but the blue matched better.

Thursday, July 21, 2011

Girl's Birthday Cards


I decided to do a Kid's Birthday card swap on my Favorite MB. Swappers could sign up for Boys or Girls or a combination of both. I went with a stamp that my hubby bought for me about 3 Christmases back that I HAD TO HAVE. Sadly this is the first time she's seen the light of day! I tried my hand at using some of those alcohol markers, and although I am sure I didnt use them the proper way, I am pretty happy with the results. The background I embossed with Stampin' Up's Perfect Polka Dots embossing folder which I ran through my BigShot. I finished it off with the sentiment punched out and layered with circle punches and the scalloped circle punch. I couldn't decide if I liked the sentiment on the white or the purple, so I did some of each.

June's Card Club


One of the great things about card club, besides getting together with a great group of ladies, is that you get to see different people's creativeness. Tonight was Card Club and my usual group of ladies, along with a couple new ladies, came over to make cards. The first picture is my original sample. It features Pretty in Pink and Whisper White Cardstock with Concord Crush Designer Paper (DSP). I colored the image from the soon to be retired (retires June 30th) "Pun Fun" with my Stampin' Write markers. The polka dots on the latte mug were done with the white gel pen by Signo. The sentiment we stamped and then punched with the Word Window punch and then layered it onto Concord Crush which was punched with the Modern Label punch. At Card Club I also offered Fun and Fast Notes so everyone could choose an image/sentiment that best worked for her.

The second picture, I made at card club to show what it would look like without the Concord Crush strip. Some ladies liked it with, while others liked it without! Either way it looks great!

Are you interested in joining us for Card Club?? Why not check my website to see when the next Card Club meets:
http://www.stampinup.net/esuite/home/gina_thornton/
Can't make it here? Have a card club with you and your friends, you provide the location.

Sunday, July 10, 2011

Quilted Thinking of You


I have always liked the looks of the quilted card made with the Top Note die! Here is another spin on it which I created for the Summer Month's Fronts swap on my favorite MB. The theme for June was Thinking Of you. The sentiment is from Sincere Salutations. The papers and ribbons were all from stuff I had on hand, which coincidentally came from a RAK (Random Act of Kindness) from someone on my favorite MB.

Sympathy Fronts


So this is the right picture....Above are the fronts I created for the Sympathy Card fronts for my Monthly Card front swap on my Fav MB. It features the Thoughts and Prayers set. I also used an embossing folder on the background paper. I did a little embossing on the edges just to give it a little more color. Then finished it all off with a ribbon. The sentiment is punched out with the oval punchm then matted on a scalloped oval and dimensionals to give it some pop.

Wednesday, June 15, 2011

Red White and Blue Hello


Isn't this little girl the cutest? I found this stamp in a Craft Store in Ohio when we were there last September for my brother's wedding. We don't have the store near by here, and since it is at least a 10 hour drive to get there, we always make time to stop in and see what is new.
Anyway, I made this card for my Addicted to Cardmaking swap on my Favorite MB. I used my Stampin Write markers in Real Red, Daffodil Delight, Soft Suede, Blush Blossom, and Brocade Blue (I think). The sentiment is from Stampin' Up's "Hello Again". I love how it sort of looks like she is peeking through a window! The background is also embossed with a star folder and my BigShot.

LOL It appears I had the wrong picture there! But It's fixed now! Sorry about that!

Tuesday, June 14, 2011

Country Flowers


I thought I would share the finished card that I made to show the simple knots below. This is for my card front swap on my Favorite MB, the theme is ribbons. I used a now retired Stampin' Up set called "Country Morning". I stamped the image on watercolor paper and used my Stampin' p markers as well as Classic Ink pads and a blender pen to color the image. The cardstock, paper and ribbon are all stuff I had on hand.

Saturday, June 11, 2011

Tying a simple knot

There was some discussion on tying bows and ribbons on my favorite MB. and I thought I'd make a photo tutorial of the way I tie my knots. I love doing them this way. No guess work! AND it uses less ribbon!!!

Step 1 cut a piece of ribbon long enough to fit your card with some to overlap:

Step 2. Adhere the overlap to the back of your card. I like to use masking tape, just to be sure it isn't going anywhere:

Step 3, slide a second piece of ribbon (still attached to the spool - or you can cut a second piece about as long as the first)under the ribbon:

Step 4 "fold" the top piece over the bottom of the "knot" part, a fellow crafter described this as what the Awareness Ribbons look like:

Step 5 tuck the tail of the top piece into the "hole":

Step 6 Pull ribbon tight. If you have a two sided ribbon, like I used, flip the top piece over so you can see the design before you pull it tight:

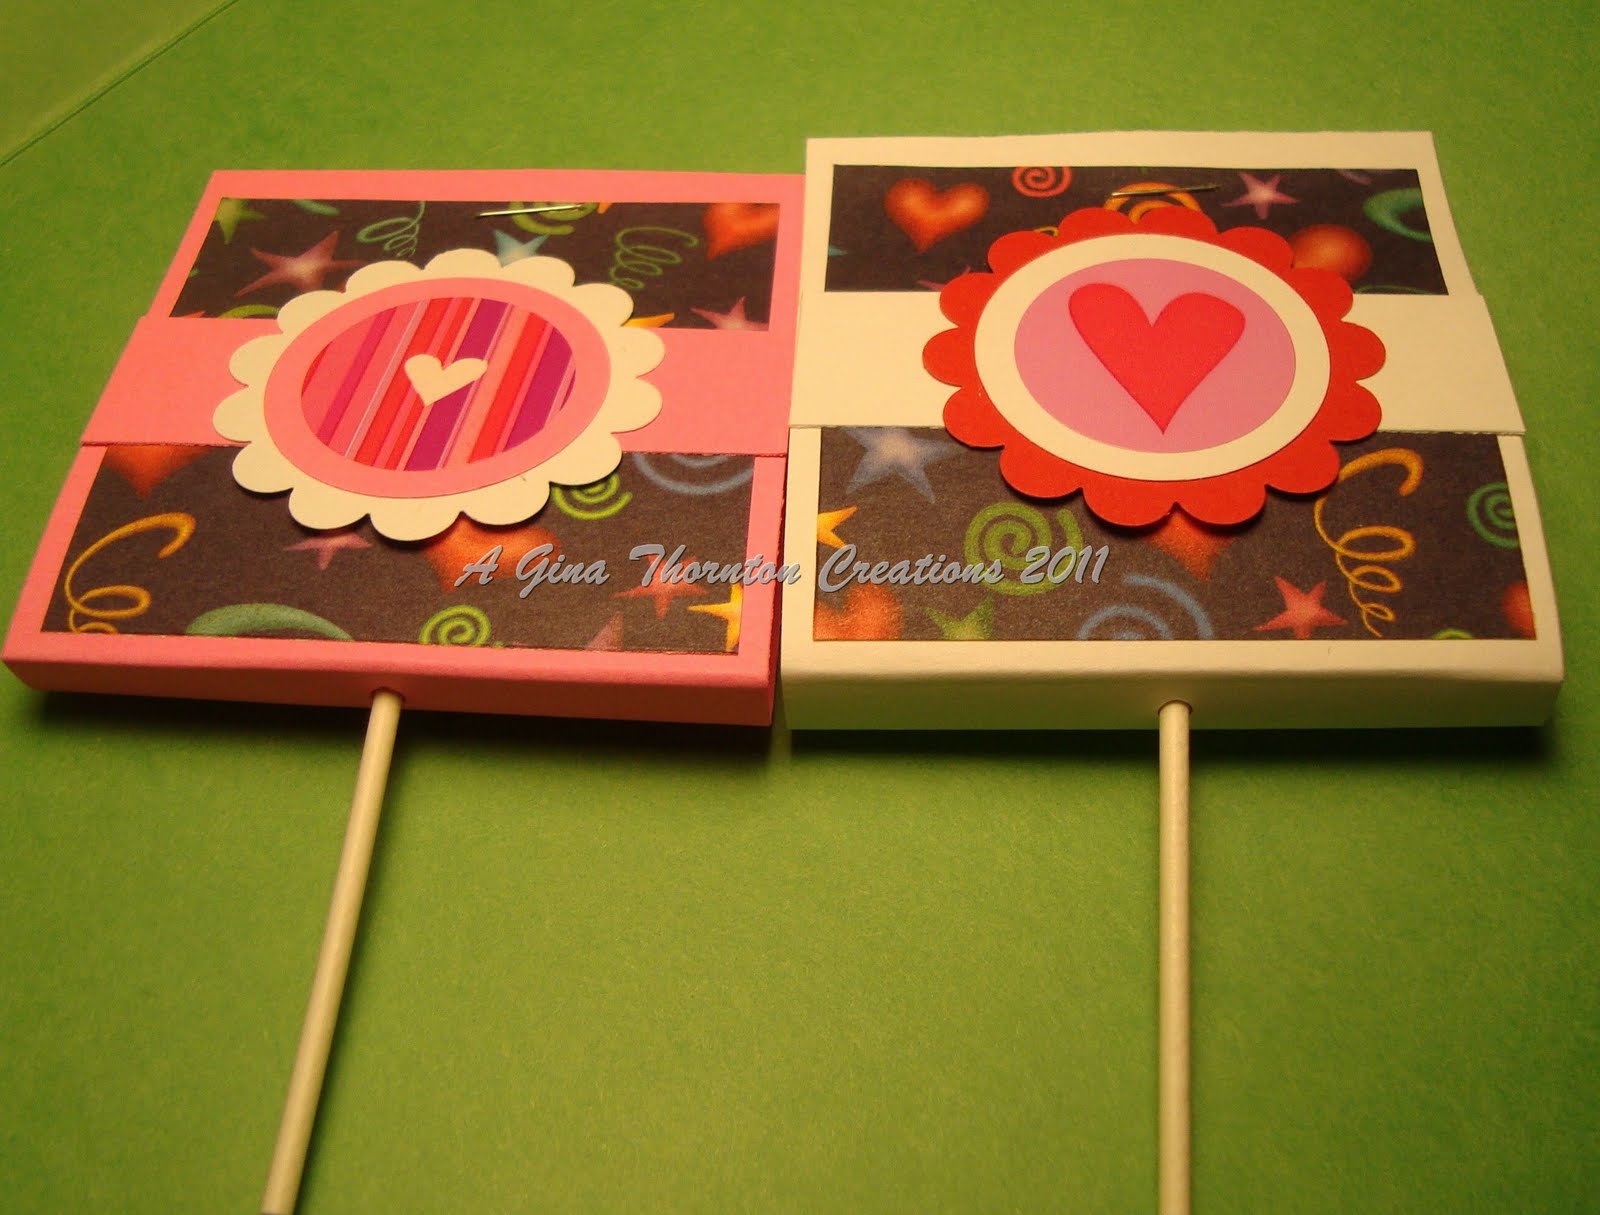
Here's what it will look like, You can make the tails of the knot longer or shorter according to your preference:

The part I love about this knot, is if the knot isn't where you want it, take a hold of one of the tails and slide it until the knot is where you would like it. If you want shorter tails, just trim them down. You can also pull the tails in a different direction if you'd like.

I hope this helps anyone who was having trouble!

Monday, April 25, 2011

Card Front Swap - Based on a Sketch

These are my card fronts for April's Card Front Swap which I am hosting on my favorite MB. The theme was Based On a Sketch. I took the sketch from StampTV's site and it looks like this:

I decided to flip my card horizontally, abut to still follow the sketch. Here's what I came up with.
I have to say that this may very well be my new favorite technique! It's called Inlaid Embossing.LOVE it! Each of those spirals is individually punched out, adhered to the white piece of cardstock, and then the whole thing is ran through my BigShot with my Square Lattice Embossing folder. I love love love the way it turns out!!! It almost looks like the spirals are patterned paper! I added the sentiment to the Decorative Label punch which I cut in half. So you are able to get two sentiments on each one. I know these colors are bright, but I think that's why they came out so cool!! I was even thinking of this as a birthday card for a teen who is "too cool" for birthdays! You have to try this technique if you haven't already! You will love it!

Friday, April 22, 2011

Addicted to Cardmaking - Friendship


I created these cards for my Addicted to Cardmaking card swap on my favorite MB for March's theme, Friendship. Okay, I am working backwards, but that's okay, at least I am posting right?? I love this little bunny and mouse! Aren't they cute?? I went with purple backgrounds, not sure why, but I liked it with the pink. And I am trying to use up some of the millions of sheets of papers I have weighing down my shelves in my craft room! So I am making a conscience attempt to use patterned paper in my cards whenever possible! I colored the cute little critters with my Stampin' Up Marvelous Markers. I picked some nice bright cheery colors. I really like how it turned out!

Thursday, April 21, 2011

Another Blog hop, happening soon!!!


Another great blog hop is happening soon! This time the theme is FROGS!! Don't forget to hop along with us! It will all start on Karel's blog! The Totally Frog Blog Hop April 23-24th! I will be a stop along the way on my other blog found here:
http://ginathorntonstamping.blogspot.com/

Wednesday, April 20, 2011

Addicted to Cardmaking - Pretty Papers


I know I haven't been posting for a while on this Blog. It's not because I haven't been creating. I have. I have just been lazy and haven't been pulling out the camera like I should be!
I'm going to try to rectify that situation. I am going to start by showing these cards. The theme for April's cards for my Addicted to Cardmaking cards which I host on my favorite MB, is "Pretty Papers". Now granted these are not the prettiest papers I have, but I find that they are challenging! I mean really what more can you say?? Happy Birthday is printed all over the paper! I saw a layout similar to this on display in a chain craft store. There's had paper with buttons all over it, and they tore the paper and stamped a sentiment on the cardstock. I knew I didn't need any more sentiments, so I went instead with an image of some birthday candles. And since those packs of papers that you get come with the same papers in multiple colors, I made a few in each color. I used my Marvelous Markers to color in the image, and I must say I think the colors match pretty well!
I am so glad it's Spring!! I was able to shoot these pictures out in the Pine trees that line my driveway. I looked around for flowers, but alas, they are few and far between here at my house. Now dandelions....we have plenty of those!

Sunday, March 13, 2011

It's almost time for a Blog Hop!


It's almost time for another blog hop! The fabulous Karel at One by One The Flamingos Are Stealing My Insanity is hosting another blog hop! Don't forget to stop back March 26th and 27th to hop along and see some awesome projects and for chances to win some great blog candy!!
This hop will happen on my other blog, so be sure to check it out there! Here's the link: Gina Thornton Stamping

Friday, February 25, 2011

Baby Shower Thank you cards


I already posted these on my Stampin Up blog, I know not all of my followers are followers there, and I wanted to share these with you. Please know that the image on these is not Stampin' Up. First I have to say that Ilina Crouse, a fellow PhillyInker, taught me how to make these cards at a Make and Take at one of our meetings. And I am so glad that she did!!
A friend from work is having a baby, a little girl, and we had a surprise Baby Shower at work for her today. I wanted to make her some cards as a gift, and I knew these were going to be perfect for her. The "Onesie" itself is all hand cut. I could have used my circle punch for the neck hole, but I fear, my circle punch has seen better days. The "ruffle" around the neck and leg holes is YoYo Yellow cardstock (retired)with the Scallop circle punch. I stamped the image twice, once on the card and then on some scraps. I colored the one on the scraps with my YoYo Yellow Stampin' Write marker. Once it was dry, I used Crystal Effects over top to give it some shine. After all of that was dry I cut it out, put on some dimensionals and added it to the card. The sentiment is from Stampin' Up's "Short & Sweet" set.
I decided I wanted to make a box for the cards, and found this one at SplitCoastStampers. The top is made with a sheet of Transparencies, which I got at a local office supply store. I have to say Transparencies are not the easiest to work with. :( And BTW they don't cut well with the Scallop Punch. I guess it is too thick?
Anyway, I love how these turned out!

Sunday, February 13, 2011

Valentine's for the kids

Inside: "And lots of Valentine Fish kisses!"


Inside: "Valentine I think you are out of this world!"


Can you believe it??? I actually am ahead and made the kids Valentines this year! And they are done before Valentine's Day!! Aren't you proud of me?? Well, I am proud of me!
The first Valentine is for my daughter. I saw some fish cards on the internet by various people, and thought this would make a cute Valentine! Cheyenne is on this fish kick. She's always asking me to cut out some fish out of paper, so that she can decorate them and then hang them on her walls. So I thought she would appreciate the fish on this one. Although now that I think about it, she will probably be asking me to make some of these for her next. I used the Ornament Punch by Stampin' Up, and the fins are using the 5-Petal flower punch. The eyes I cheated a little and used the eyes from Owl punch. The hearts are punched using the Heart-to-heart punch. The paper is from my stash, but since it was a water print, I thought it went well with the card! The sentiment I typed on the computer.
The second card is for my son. When I thought about a card for him, this is the set that came to mind. The aliens are from "Greetings, Earthling" set by Stampin' Up. The hearts in between the aliens are punched using the Heart-to-heart punch. The hearts in the background are stamped with some old heart stamps I have in my stash, and are stamped using VersaMark. I colored the images using my Stampin' Write Markers.
The last picture is Valentines that I made for the kids that go to my school. I was inspired by the ones that Cheyenne made for her class. I made pink ones for the girls, and the white ones for the boys. Inside there are cherry flavored lollipops.

Cheyenne's Valentines


In leiu of buying Valentine's for school this year, Cheyenne and I decided to make them ourselves. I have had this printed paper forever, as well as the pink cardstock. And those stickers? I've had them at least 5 years! So it was a very inexpensive to make these!! She stuck down the stickers herself, so a few are a wee bit crooked, but I think she did pretty well!

Wednesday, February 2, 2011

White on White Addicted to Cardmaking


These are my cards for February's Addicted to Cardmaking swap. The theme is White on White with one other color. I chose to go with this leaf stamp from Stampin' Up's now retired "Lexicon of Leaves". I first inked up the stamp in Pumpkin Pie and then "Bammed" some Cherry Cobbler ink on top. The edges are all distressed and the sentiment is is stamped with Pumpkin Pie. The background was embossed with one of the texture plates from Stampin Up's "Perfect Details" Texturz plates (item #115962)I think it gives the card a nice touch. (although you can't really see it in this picture.)

I'm moving on up....to ETSY!

In a continuing effort to make a profit for some of my creations, I have branched out into ETSY territory! I only have a few items listed so far, as I am still trying to feel the ropes! More items will follow soon! Check out the link on the left hand side to go to my store!

Tuesday, February 1, 2011

Rain Rain Go Away


The theme for February's Card Fronts is Green. I made my hubby buy me some of these stamps a few years ago for Christmas but, sadly I haven't used most of them until now. I pulled these out and her gear just screamed Green to me! I colored them with my Stampin' Write Markers in Green Galore, Gable Green, Bashful Blue and Creamy Caramel. The puddle actually came out well in this picture even though the picture is kind of yellow. I added Crystal Effects to the puddle to give it some shine. For the Card fronts I included "Rain or Shine" and also "Heard you're under the weather?" (Or something to that effect). This front I made into a card and added the little silver beads before the sentiment. Inside I stamped another pair of boots, and the sentiment. The great thing about clear stamps is that you can put them onto your blocks and bend or alter the way the stamp looks. So although this sentiment is really in a straight line, I made it go in a wave. Perfect for those of us who can't stamp our sentiments straight just by eyeballing!
Still messing with my light box. :( I accidently put my hand through the top of the tissue paper the other day. Then I needed to get a new lamp (I "borrowed" my kids computer lamp - which was mine way before they were born, and they wanted it back) and now I just can't seem to get it right. I am not giving up though!!!

Thursday, January 27, 2011

I'm going "HIGH TECH"!!!


In an effort to promote my Stampin' Up business, as well as my hand made products, I have created a Facebook page. It was named by my daughter (I wanted something cute but catchy). If you have a moment come and check it out, and if you like what you see, please become a fan!!

Bright and Happy Thoughts - Card Front


I am still playing with taking pictures in my light box. I did get a bigger box, but I need a brighter light I think. Or maybe less tissue paper? I have the poster board in there now at least.
Anyway I made these card fronts for my Card Front swap on my Fav MB. The theme was shapes. You had to incorporate some sort of Geometric shape in the background of your cards. I have a stack of paper that has a bunch of this square papers in that I never know what to do with, so it worked out perfect for this! The sentiment is from Stampin' Up's now retired set "Think Happy Thoughts". I used my Stamp-a-ma-jig to line up the flower in the center of the sentiment. The flower is embossed with white embossing powder. The speckles are done in VersaMark's Dazzle ink.
As usual lately, I couldn't decide where to put the sentiment, so I didn't attach it. I originally used this sketch for the card, but I'm not sure I like the sentiment where they have it, I like it more on the bottom, off to the side.

This is from PageMaps by BeckyFleck, and can be found in the March Card Maps 2008 Archives.

Tuesday, January 25, 2011

Show me the Love - ACM swap


One of my goals this year is to take better pictures of my cards. So I made a light box out of one of the empty Girl Scout cookie boxes we have laying around. I have a little more work to do on it. I didn't have any poster board, so I used what I had, kids drawing paper which comes on a roll. It is sort of on the off-white side, but I just wanted to get a feel for the box, so I used it. I also have different kinds of light bulbs. I do have an Ott-lite, but it's on a short bar, so it's on the side. I think it would work better if it was the one that on the top, but like I said I am still playing with it. These are the first pictures that I took.
Anyway, the theme for January's ACM is "Show me the Love". I totally CASED this idea from the WONDERFUL Ilina Crouse. Ilina is a fellow Philly Inker, and her creations are amazing!! I changed up the colors from her card. I used everything I had on hand for these. I have this tablet of 4 x 4 patterned paper that I never know what to do with, and so I used some papers from that. One pattern had stripes (first picture), and one had a damask pattern (second picture). The ribbon is also some that I had on hand. I used the Full Heart punch and the Heart to Heart punches. The large (Full heart) heart I first layered it on white cardstock to give it some thickness. Then I ran it through the BigShot with the Perfect Polka Dots embossing folder, and then then used dimensionals to give it dimension. Then to finish it all off, I used a glitter pen to make "stitch" marks around the hearts.

Monday, January 24, 2011

Winter Card


How many of us have a ton of fibers and ribbons that you just HAD TO HAVE and when you got them homw wondered "Now what am I going to do with that?" LOL me too! I bought a bunch of Fun Fur yarn, at least I think that's what it was called, because they had it on clearance at a local craft store for dirt cheap! I think it was like $1.00 a skein. Normally it is quite a bit more! So I of course had to have every color! That was at least 2 years ago!
So when I needed to make a winter card for a recent card front swap, I dug out this one. It kind of looks like cold wintery colors don't you think? The blue is Stampin' Up's retired Ballet Blue. The white piece is embossed with a snow flake embossing folder. The snowflake stamp is from Stampin' Up's "Serene Snowflakes" and the sentiments are from "Sincere Salutations". Lately I haven't been able to decide on a sentiment, so I stamped two different ones and included them both along with a scallop oval so that whomever recieves it can decide which occassion they would like to use it for.

Sunday, January 23, 2011

A new thing to try - Diamond Folds


One of my "resolutions" is to try new things this year when crafting. This time I choose Diamond folds. I went into Google.com, and typed in Diamond fold and found a tutorial. There's plenty to choose from. I have very little 12 x 12 cardstock, so I just went with the colors I had on hand. I did use my SU classic ink in Tempting Turquoise on the flower, taken from SU's "Because I Care", and then used my Garden Green stampin' write marker on the stem and leaves. Then I just used a sponge to create the look of patterned paper on the white pieces on the side. The sentiment is from Stampin' Up's "Teeny Tiny Wishes".

I spotted a post by a friend Crystal on Facebook that she'd create something handmade for the first 5 people to respond to her, as long as they agreed to pay it forward and create something for 5 other people. I loved the idea so I re-posted. Sadly I only got 3 takers. :( But I did send the three of them one of these.

Have a happy New Year! And Happy Creating!!!